Grumblenuts
Gold Member
- Oct 16, 2017
- 14,509
- 4,835
- 210
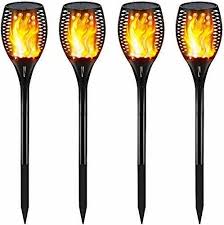
Pretty sure someone was about to throw away two of these years ago so my wife ended up bringing them home to try out instead.

Such images are obviously photoshopped to make them look more realistic, but in reality they actually do mimic a flame impressively. Our two worked well so I carefully lashed one to pipes on each end of our side porch. We'd go out for a smoke break or whatever, find the little button and say "Party Time!"
That lasted two or three weeks before one of them began to crap out. I eventually separated the top of the crappy one from its strapped pole and stuck in my garage "For Inspection When Bored" collection where it sat for a year or so. Then the idea of having two again kind of tickled my fancy or something, so I brought it in and stuck on my rack next to my desk where it's been getting in my way for at least another year.
So, as usual, up too late and too early this morning, I see it there and decide it's time. After locating the only screwdriver I own that would extract the screws (a Snap On, of coarse), I succeeded in getting it apart without any bits of plastic flying away. I have to tear junk apart before tossing it. Can't help it. Gotta know how how it was made and works. Who knows? Maybe I can fix it.. Happens sometimes!
Anyways, having now thoroughly inspected the guts, turns out they are surprisingly sophisticated and intricate. Cleverly designed to be assembled by dexterous midgets. Well worth the price and chucking in the trash the moment they quit working.


 We've got a couple of those pesky cats too.